Thursday, 19 November 2015

1920's Beauty Trend and Hair Style

Whether you’re inspired by Board-walk Empire’s forever beautiful cast of prohibitionist-era women, films like Fitzgerald’s Great Gatsby or vintage classics such as Dorothy Parker, Gilda Gray or Clara Bow, one fact remains true: women of the 1920's were worthy of admiration. Not just on a fashion and beauty level, but on political and social levels, too. The 1920's represented a surge in “girl power” — it’s when women gained the right to vote, weren't afraid to cut their hair, play with make-up or even (gasp!) drink and dance


ellimacs sfx makeup . (November 2013). 1920's Hair&Make-up tutorial.Available: https://www.youtube.com/watch?v=cs7BXX3Vp5c. Last accessed November 2015


Hair style of 1920's created of more controversy in hair fashion then in any other period in American culture. And one hairstyle, known simple as the "bob", would be at the centre of this great debate. first introduced during the Great War, the bob hair cut would eventually cause a revolution in the way women would wear their hair- forever more.


Emily Spivack. (February 2013). The History of the Flapper, Part 4: Emboldened by the Bob Read more: http://www.smithsonianmag.com/arts-culture/the-history-of-the-flapper-part-4-emboldened-by-the-bob-27361862/#GEy8MvOfY783x8XI.99 . Available: http://www.smithsonianmag.com/arts-culture/the-history-of-the-flapper-part-4-emboldened-by-the-bob-27361862/?no-ist. Last accessed November 2015


It all started in 1915's with the debut of the Castle Bob, named after the celebrated ballroom dancer Irene Castle. While cutting her hair for convenience, little would she know that she would forever be associated with triggering a revolution in 20th Century hair fashion. The Castle bob would be the first indication of things to come - the rage of short hair.

By 1921, fallowing the lead of fashion designer Coco Chanel and actress Clara Bow and Louise Brooks, young women everywhere took the plunge and began bobbing their hair.

Bela lugosi. (November 2013). Archive for the Clara Bow Category.Available: https://beladraculalugosi.wordpress.com/category/clara-bow/. Last accessed November 2015


Karen Sneddon . (unknown). Louise Brooks. Available: https://www.pinterest.com/alwaysright76/louise-brooks/. Last accessed November 2015


As the younger generation eagerly embraced this latest fad, women all of the ages would soon find themselves having to face critical decision to bob- or not to bob. Many were fearful of taking the plunge only to discover that long hair would quickly be back in vogue . In fact, professional hair publications predicted an immediate return to long hair. However, it was difficult to ignore the continued popularity of the bob.

Emily Spivack. (February 2013). The History of the Flapper, Part 4: Emboldened by the Bob Read more: http://www.smithsonianmag.com/arts-culture/the-history-of-the-flapper-part-4-emboldened-by-the-bob-27361862/#GEy8MvOfY783x8XI.99 . Available: http://www.smithsonianmag.com/arts-culture/the-history-of-the-flapper-part-4-emboldened-by-the-bob-27361862/?no-ist. Last accessed November 2015


Back in the 1920's hair styling tools weren't exactly what we know today, so back then they were created with wet hair and a load of hair gel, and fingers.


Amy. (October 2011 ). Finger & Marcel Waves – Stylish Hair of a Bygone Era. Available: http://chicvintagebrides.com/index.php/beauty-hair/finger-marcel-waves-stylish-hair-of-a-bygone-era/. Last accessed November 2015


Unknown. (unknown). Video: How to finger-wave your hair. Available: http://www.queensofvintage.com/category/fashion/how-to-fashion/page/3/. Last accessed November 2015


Wednesday, 18 November 2015

1940's Hairstyle in London


This video briefly shows how Hairdresser uses hairpiece, 1940's  hairdo in United Kingdom, Woman smokes as hair is styled. Hair wash over the sink. Hair styled using rubber pads, Early heated roller, Gadget, Immaculate hairstyle.


TheKinoLibrary. (February 2013). 1940s London hairdresser, OTT 40s hairstyle. Available: https://www.youtube.com/watch?v=rrUwMoXDpxE. Last accessed November 2015.

Tuesday, 17 November 2015

Practising before time assessment

I practise on my Kate head, so easy apply 40's on natural hair then acrylic wig. I choose some pictures, examples of 40's, I am gonna make a Victory rolls.

Monte Forest. (unknown). 1940's hairstyle. Available: http://www.erastyles.com/1940s-hairstyles.html. Last accessed November 2015.


My work 

First I brushed hair, I used curly wand to curl a hair, from the top of the hair I divided them onto one side, then I took some part of hair and curled. upwards, so the same I did on both sides, rest of the hair at the bottom I curled edges upwards also, then using two fingers I rolled them upwards also shaped 40's style and pined them.


 In front of the head you easy see kind of three layers upwards to head, was quite easy to shape natural hair and they looks beautiful on the pictures, no bends or sharp edges, only soft and silky hair.


At the bottom I rolled them upwards to the head, beautiful shine on the end and easy to shape them, well but I know won't be easy on the acrylic wig.


After that I practise on my acrylic wig, different  Retro 40's hair style, like you can see on picture below, this kind of Victory Rolls, pinned upwards to the head

Unknown. (unknown). Retro Hairstyles – How to Do Retro Hairstyles.Available: http://hot1940shairstyles.com/vintagehairstyles/. Last accessed November 2015.


I started from straighten a hair, to achieved silky glossy hair, I did not curl them, I think its quite easy shape using two fingers and roll and pin it. So this only practising some 40's retro hairstyle. I shaped everything upwards to the head.

Friday, 13 November 2015

Put your 1940's wig on your partner and make-up

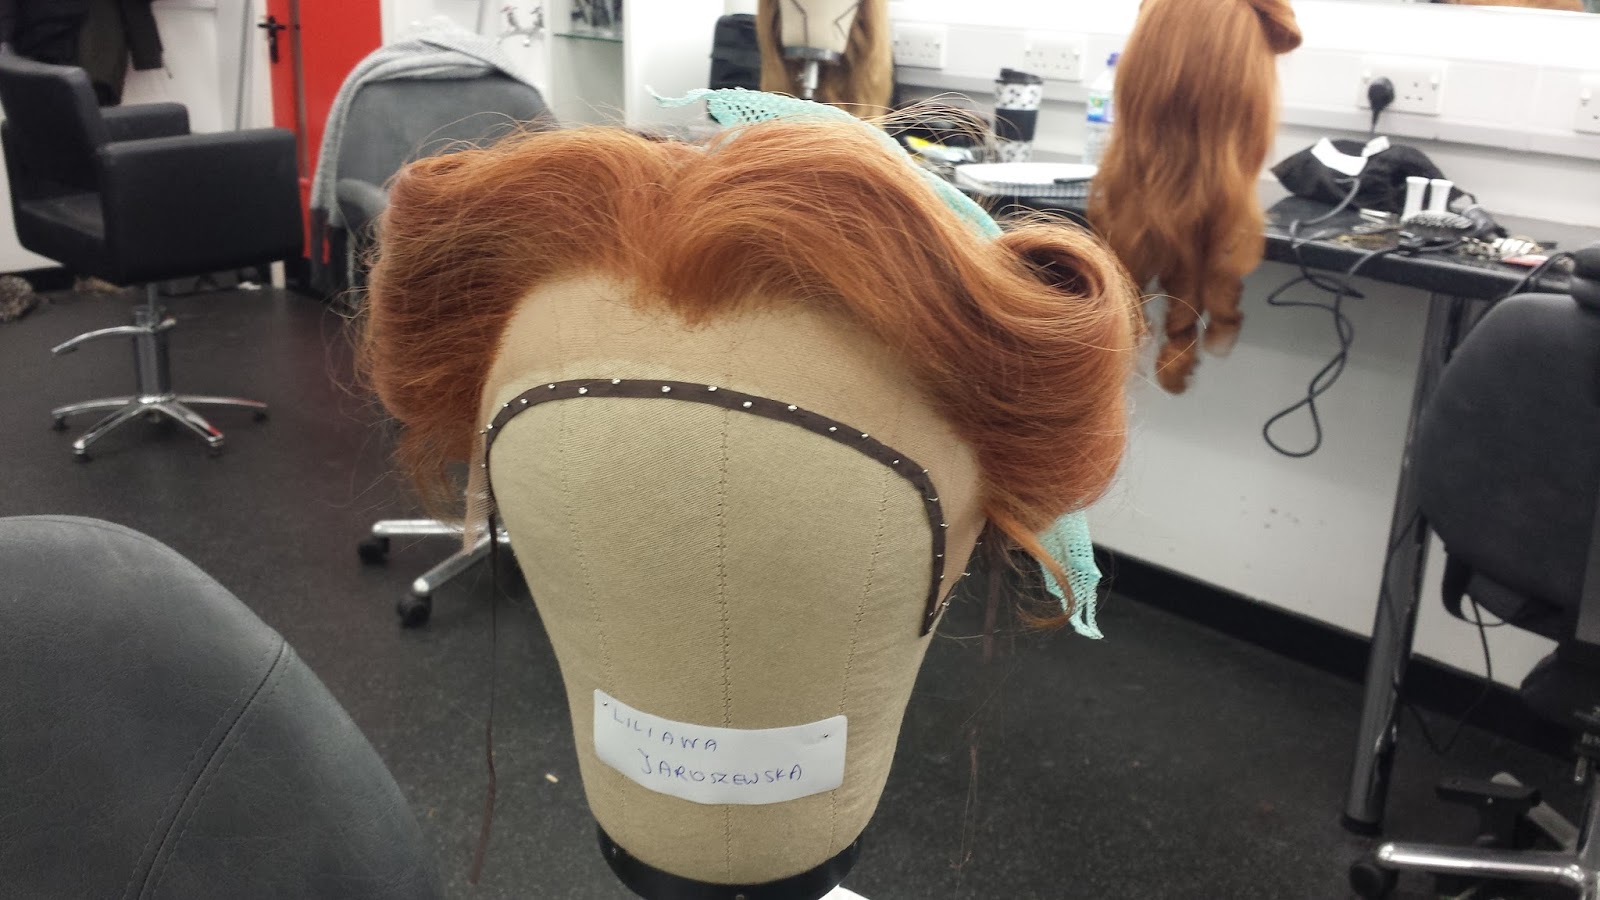
This lesson we learn how to properly shape Victory Rolls and put the wig on the partner head. We practise on lace natural wig, so definitely was easier apply hot rollers on the natural wig.On the top of the head I used hot roller upwards to to the each sides, then under an ears upwards to the face.


Rest of hair I curled by using curly wand, working like bricks layer I left each curled pined to the scalp avoid any straighten curls.


Next part, I took of hot rollers and started to shape Victory Rolls from 40's shown before by Lottie in the demo. Well wasn't quite easy, first I divide a hair onto two section, by using two fingers I rolled them slowly upwards to the middle of head and pined it.


Rest of hair I brushed by using flat denman brush, to remember holding a hair downwards to the scalp and shape some waves.


To avoids any straighten curls I put them into the triangle cap, before I will set up wig onto my partner head.


Next, I made a base for wig, in front of the head I curled hair on two fingers and pined them by using two grips, this made more secure base, rest of the hair I rolled them to the middle by taking small pieces of hair and pined them again. Then with Mihaela help I put thigh cap, any protruding hair I slipped under the cap and using pin, I secured the cap. Again, with Mihaela help I applied wig, I checked every corner, so this wig could set up straight and properly.


At the end we should cut unwanted lace and using a spirit gum, stick to the skin. That wig looks really natural on Mihaela head so I was quite happy with result after first time.

Products which I used:

  • Denam flat brush
  • grips
  • pins
  • curly wand
  • hot rollers
  • triangle cap

How to set an acrylic wig

Lottie teach us today how to set an acrylic wig, I didn't know it will so hard, because we can only use the steamer and normal rolls. By using steamer we can easily straight the hair and set up rolls. Took me some time to put on the whole head rolls.


I used small a medium size rolls, from the front I applied the same like hot rolls, I took roll length on the top of hair, started from the middle to the sides downwards to an ears, the same on the other sides, around an ears upwards to the face- the same on the other sides. Them by using a medium size I rolled a hair downwards to the bottom, build like bricks layer, to avoids any gaps between the hair.
So the rolls I could keep until my time assessment for few days to achieved beautiful curls, I didn't take a picture after when I took rolls off. For my most important was practising apply a rolls. An acrylic wig has a fake hair so its very difficult to applied because very tender hair, if you make some mistakes like using grips to secure rolls you can get some bends of the hair so try to avoid this.


Setting your moustache

Finally, I finished my moustache, knotting moustache was quite easy and relaxing, took me longer than I expected, only because wasn't never time to do knotting. I left my long length, I wanna to have the similar like man from website comparethemarket.com, This is exactly hoe my moustache looks.


Well, to start was quite difficult, I really struggle with knotting one to one hair, so I knotted two hair in one hole, then after few line I realised, are too many of them, so I started do one to one. 


At the end I knotted  two hair in one hole too save a time, because from the beginning second part I started knotting one to one, to make the equal I knotted half two hair in to one hole. You can do knotting as many ways you want it, depends what you doing. When I finished I used curly wand to give them look what I want it, I didn't cut them to keep long length .

To set up my moustache I did on myself, I cut as short I could the lace to properly fit my moustache, then I shouldn't but I used Duo glue for fake eyelashes and applied a little bit onto cubic bow, where should be place it moustache. They are look very natural, and I look silly.


Thursday, 12 November 2015

Practising contemporary look- 1940's Victory rolls with modern twist

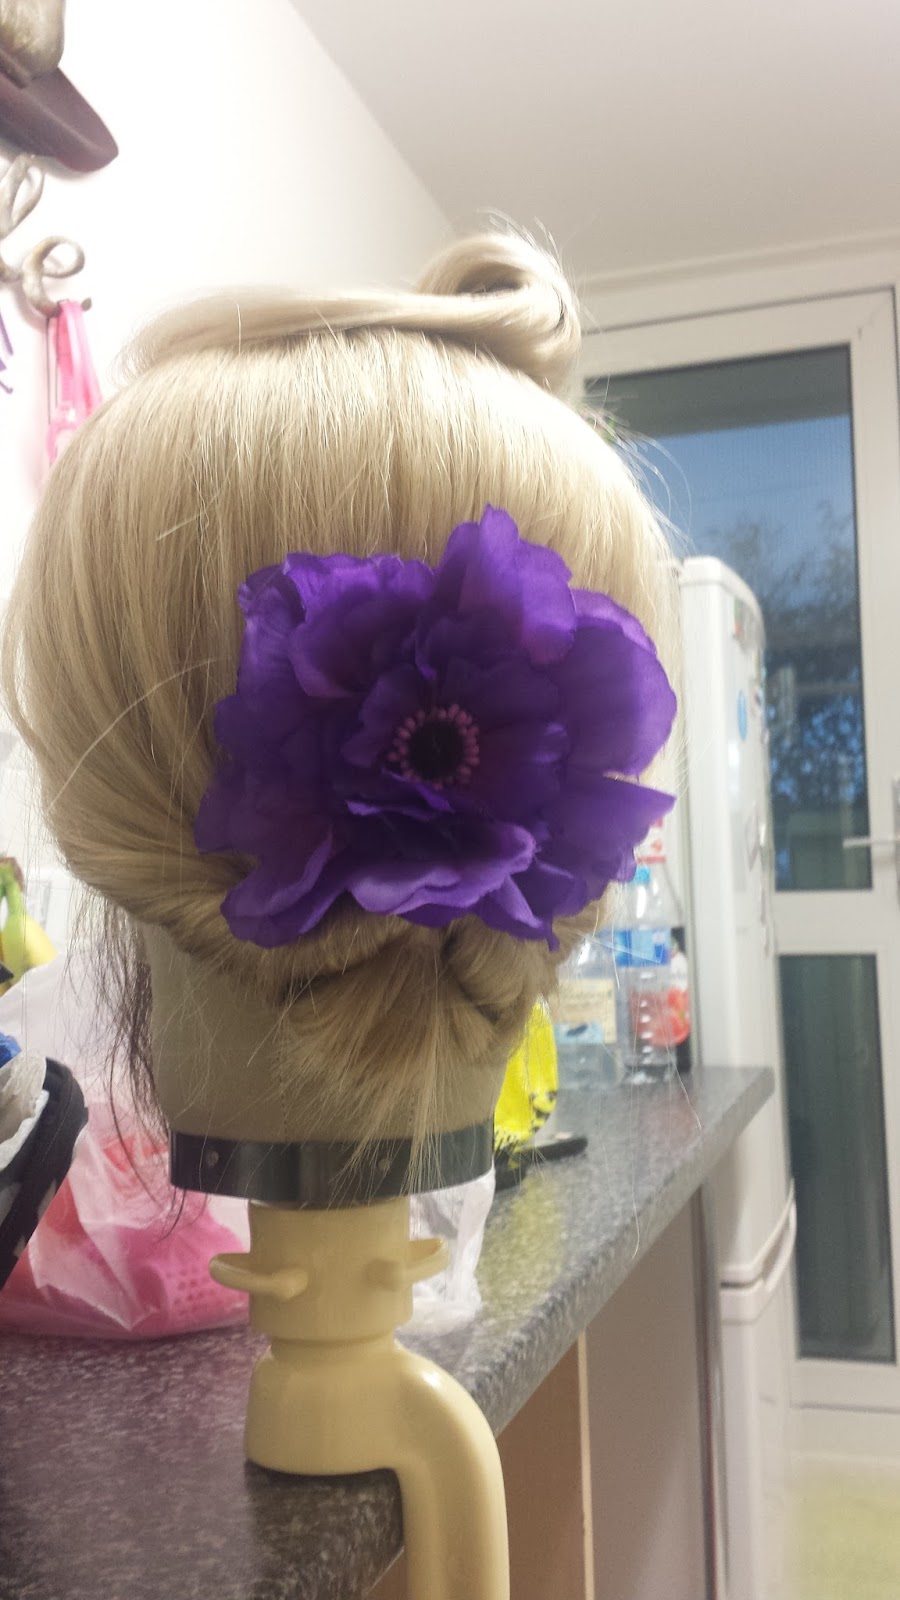
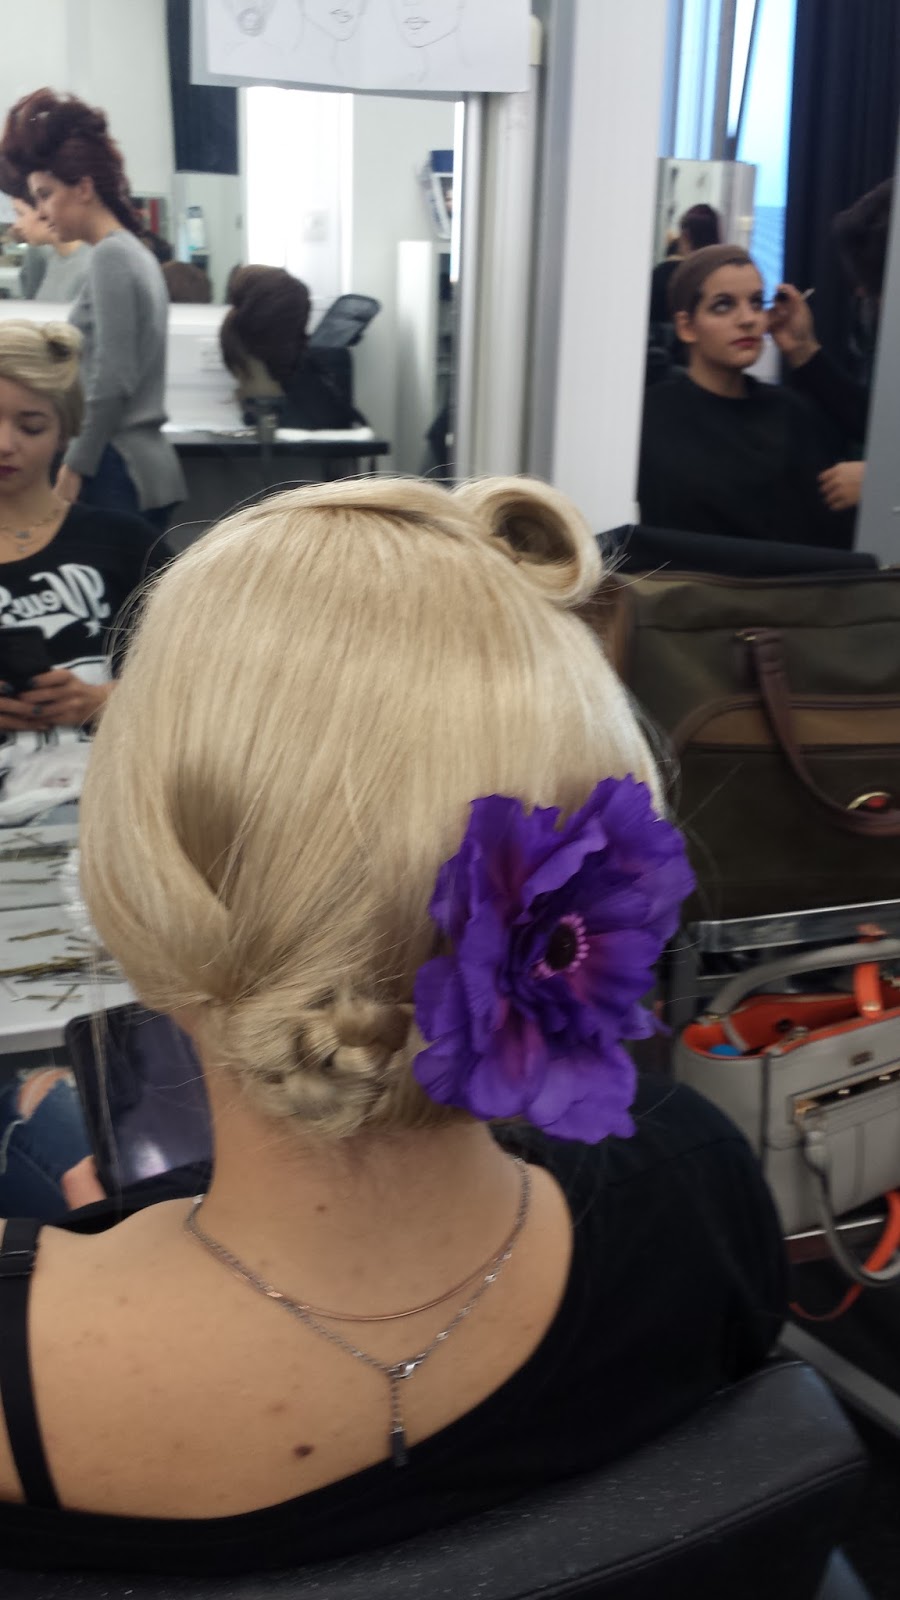
Well, isn't easy to create something which looks amazing and have a modern twist. So my chosen decade was 1940's Victory rolls. So this contemporary look I will made with on the one side victory roll and small bun from braids at the bottom of the head. So first I straight a hair, this time I want it to get silky smooth look


So, first I straight the hair to get the silky smoothly hair, by using flat brush and steamer, and wait until dry completely. Then I separate fringe with some more piece of the hair on the top of head, smooth them by using hairspray and wax, to smooth protruding single hair, then using my two fingers I rolled them and pined them to the scalp, using bobby pins. I really struggle with this part, a many times repeat it to get properly Victory rolls, secure them with more bobby pins hiding between hair .


Next part, from hair behind the head I made two small braids, I left I the middle straight. Here on the pictures I did differently, I did pony tail and made a space-gap between hair and slipped the hair in the middle, edges put inside the twirl and pined.


I added purple flower to decorate the hair.


 Here you can see, I made two small braids, pined them to the middle, straight hair insert between braids, and secured with bobby pins. I was quite happy with my modern look.


Next step I practise to put the acrylic wig on my friend head. So I made it a base from two French braids. I secured them with bobby's pins.


Next part with Mihaela help I insert thigh cap to cover hair, any protruding hair slipped underneath cap and secured with pins.


Then again with Miheala help I put an acrylic wig on her head, checked  that was straight, any protruding hair slipped underneath, secured with pins and style it if I made some damage.


So this is my practical final temporary look, I was quiet happy with result.


Product which I used for this style;

  • apron
  • bobby pins
  • pin tail comb
  • flat den man brush
  • grips
  • thigh cap
  • purple flower
  • hair bands
  • hair spray
  • styling wax
  • steamer